Viewing Product Lists
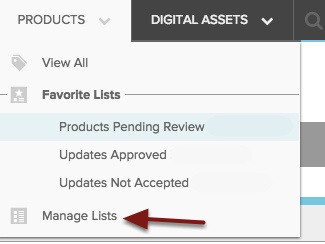
To view product lists in Salsify, click on the Products menu and select Manage Lists.
The Products Menu will also show any lists that have been marked as Favorite Lists in Salsify. Marking a list as a Favorite List can be done on the Manage Lists page.
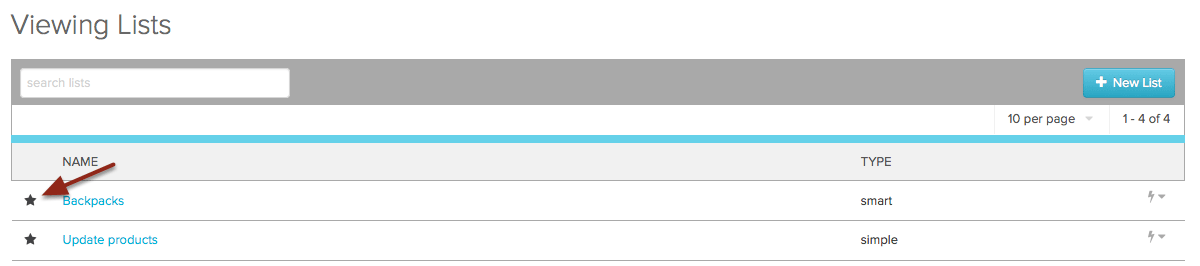
Once you are on the Manage Lists page, you can create a new list as well as view lists that have already been created. Selecting the name of a list allows you to view which products are included in that list.
Creating a new Simple List
Simple lists are static lists that include a fixed group of products. To create a simple list of products,
- Click the + New List button.
- Select Simple as the list type.
- Name your list.

Adding products to your Simple List
- Click the blue Actions button.
- Click Bulk add to this List.
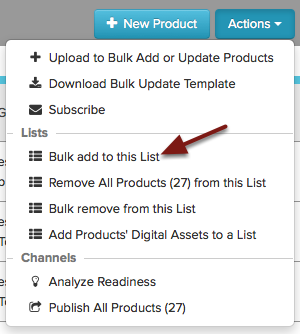
- Paste the Item Number for the products you would like to include on this List.
- Click the blue Add button.

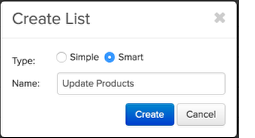
Creating a Smart List
Smart lists are constructed using property specific filters and are driven dynamically as product content is added or updated. To create a Smart List of Products,
- Click the + New List button.
- Select Smart as the list type.
- Name your list.
- Click Create.
Smart List Overview
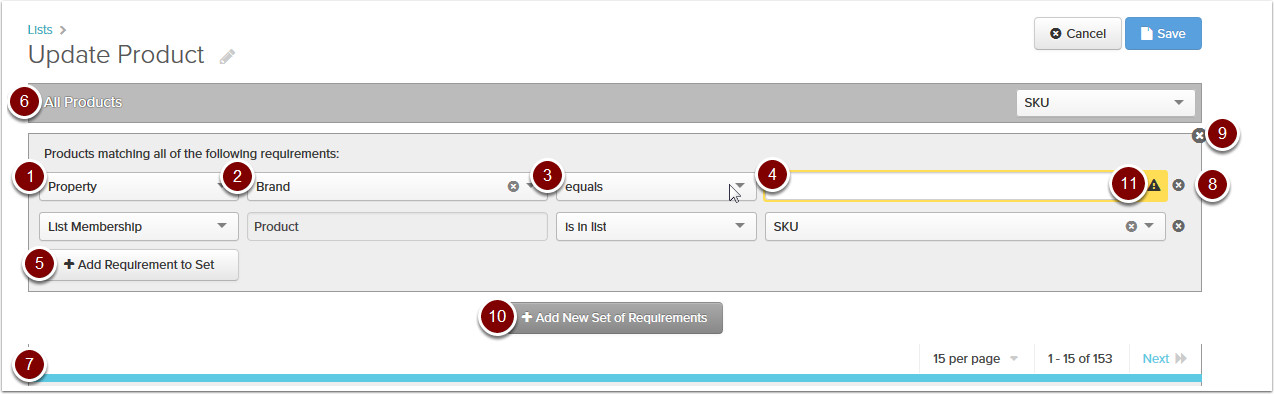
- Use this dropdown to choose the filter type. You can filter by:
- Property - Filter by any property in Salsify. The options available depend on the property type. See the list below for full details on filter options by property type.
- List Membership - Filter by whether or not a product is included in another list. Helpful if you want to combine an existing list into a new list with other criteria.
- Note that Workflow is not currently an available feature.
- Use this dropdown to select the property you want to search by. It will be unavailable to set for Workflow Status or List Membership requirement types.
- Choose the appropriate option for the requirement. In general you can either include or exclude based on the condition you set. See the list below for options and their meanings.
- Appears when you have an option with either multiple selectors or a value to fill in. Only appears if it applies to the type of filter you chose.
- Click Add Requirements to Set to add additional requirements to further refine the current group of products. Products will only be returned if they satisfy all requirements in the set.
- After you finish changing each selection, the number of matching filtered products for your entire filter set updates to the grey bar above your filter set.
- A preview of the products in your filtered result appears at the bottom of the page.
- Use the minus symbol to remove an individual requirement from a set.
- Use the x symbol to remove a requirement set from the filter results.
- Choose Add a New Set of Requirements to add another independent set of requirements, resulting in another group of products being added to your filtered results.
- If a field is required but not filled in, a yellow alert will appear. Complete the requirement to add the condition, or click the - to remove the requirement.
Available Filter Types & Definitions
Filter by Property
You can filter by any property or combination of properties in Salsify. Each property type has a set of criteria to choose from. See the list below to understand how to use the options.
To filter by property:
- Be sure Property is selected in the first dropdown menu on the left. It is the default option.
- Click the second dropdown menu and choose the property you want to filter by.
- Begin typing the property name, or scroll to select from the list.

- To change the property you want to filter by, choose the x next to the property.

- Begin typing the property name, or scroll to select from the list.
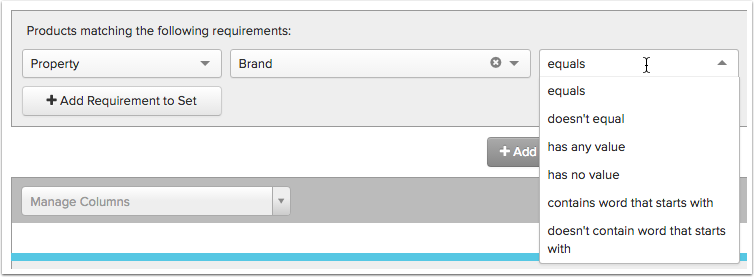
- Depending on the property type you choose, you can select from the available options. Click the dropdown menu and select the option you want, or click to change an existing option. See the list below for details on the options.
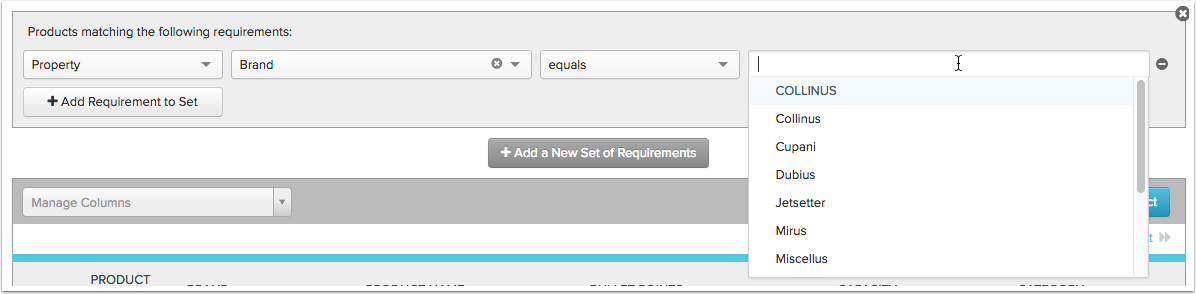
- If you choose an option that requires details to be entered, do that in the last field.
- Click Add Requirements to Set to select more filters for this set of products, choose Add a New Set of Requirements to add another group of products to your filtered results, or click Save to save your filter.
Filter Options by Property Type
Each option is defined the first time it appears. The subsequent instances all have the same definition.
- String, Picklist (Enumerated), Rich Text
- equals - exactly match the option or string chosen in the 4th box. You can choose multiple picklist values, which are treated like “or” - ie. Brand equals Jetsetter or Wildflower includes all products that have Jetsetter brand and Wildflower brand. Use the x next to each value to remove the requirement. For dates, use format YYYY-MM-DD.
- doesn’t equal - excludes exact matches to the option(s) specified.
- has any value - includes anything that has a value filled in regardless of the value.
- has no value - includes anything that has no value for the property.
- contains words that start with - Includes any product where the property contains words that begins with the specified text string. Use the longest string that still applies to avoid unexpected results (ie. contains words that start with “the” would include the, theater, them ,then, etc.)
- doesn’t contain words that start with - Excludes any product where the property contains words that begin with the specified string.
- Number
- equals
- doesn’t equal
- has any value
- has no value
- in between - Specify the low and high range in the 4th and 5th blank to choose all numbers that fall between those two values.
- Digital Asset
- has any value
- has no value
- Date
- equals
- doesn’t equal
- has any value
- has no value
- Yes/No (Boolean)
- equals
- doesn’t equal
- has any value
- has no value
- Link, HTML
- has any value
- has no value
- contains words that start with
- doesn’t contain words that start with
Filter by System Property
Filters by system assigned dates of when the product was created or updated.
- Date Created - Products created on the date/date range specified will be included in the filter.
- equals
- doesn’t equal
- has any value
- has no value
- is between
- is after
- is before
- Date Updated - Products updated on the date/date range specified will be included in the filter.
- equals
- doesn’t equal
- has any value
- has no value
- is between
- is after
- is before
Filter by Channel Status
- Select Channel - Choose the channel you want to check status for. Channels with readiness reports are included in the available options.
- Channel Status Parameters - Products that were published during the date/date range specified will be included in the filter.
- equals - select a publish status type without specifying a date range. Includes everything that meets the publish status selected since 11/4/2016. Historical publishes prior to this date are not included in results.
- Published - Products included were either directly syndicated, were included in a downloaded syndication spreadsheet, or were marked published in a download from the readiness report.
- Not Published - Products included have not been published to the syndication partner.
- Updated Since Last Publish - Products included have had property values updated since the last time it was published to the specified syndication partner.
- equals - select a publish status type without specifying a date range. Includes everything that meets the publish status selected since 11/4/2016. Historical publishes prior to this date are not included in results.
Filter by List Membership
- is in list - Includes all products that are included in an existing simple or smart list.
- is not in list - Excludes all products that are included in an existing simple or smart list.
Sets of Requirements
Adding sets of requirements allows you to add multiple unique sets of products per filter result. The products in each requirement set all must meet the requirements of the filters inside the set, but each set is independent of the others.
You can think of a set of requirements as a set of “and” functions. A product has to meet all the requirements of the set to be included in the set. Adding another set introduces an “or” function. Products in the filter can meet either the criteria of the first set of requirements, or they can meet the requirements of the second filter set in order to be included in the list.
This allows you to add multiple groups of products to the same filtered result. The products may overlap between requirement sets, and your list would contain a set of products that meet the first set of requirements and a set that meet the second set of requirements.
Favoriting Lists
To mark a list as a Favorite, select the star icon next to the list you would like to favorite. Each user has their own set of favorites, so setting this will only make it favorited for your user account.