
You can upload digital asset to individual products, or you can upload them in bulk and link them to products in bulk. You can either upload the files from your computer or you can use publically-accessible, non-login URLs to upload from.
Click here for more information about uploading digital assets in bulk.
Add Digital Assets Directly to Products
You can add digital assets to a specific product by uploading them to the product details page. You can also associate digital asset to a product that were previously uploaded in bulk.
- Navigate to the product details page. Click here to learn more about how to navigate in Salsify.
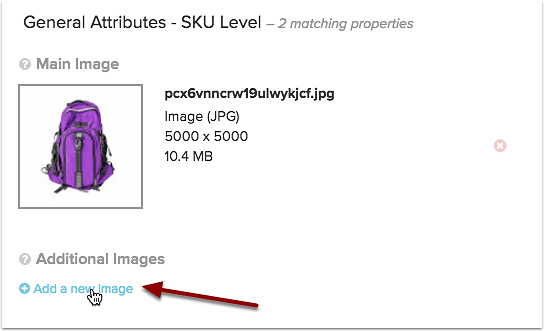
- Scroll to the digital asset fields you want to use, or use the search box to narrow properties. Often it's easiest to start typing "image" into the search box to narrow the results to all properties that contain "image".

- Click Add a new image under the property you want to add the image to. If Add a new image isn't available, the image you have meets the criteria for the property. In this example, the Main Image is filled in and only one image is accepted for the property. If you wanted to replace the main image, remove the existing image by clicking the red x, and click save to get the option to add a new image.
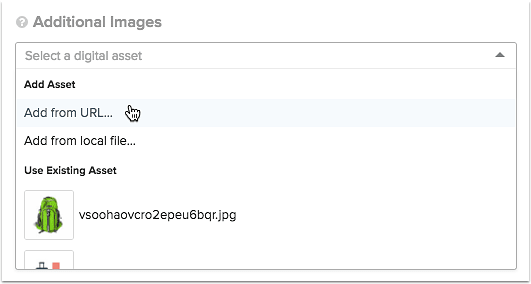
- Choose the option you want to use to associate the digital asset with your product.
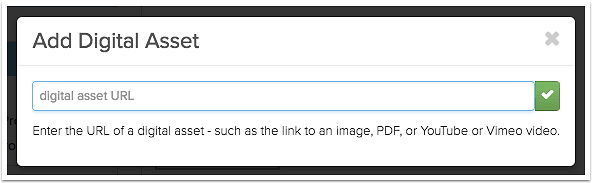
- Add from URL... Choose this option to upload the image from a publically-accessible non-login URL.
 Choose the option, then paste the URL into the box and press enter or click the green checkmark.
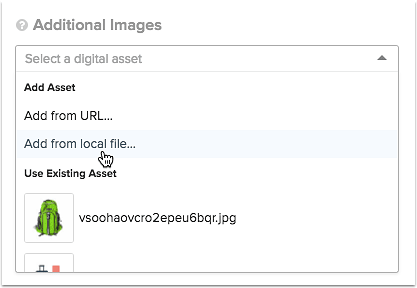
- Add from local file... Use this option to upload a file from your computer.
 Choose the option, then either drag and drop or click the Select File button to navigate to the file you want to upload.
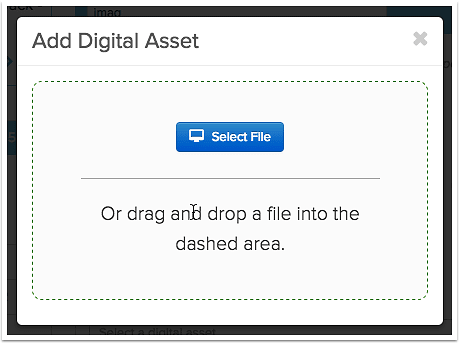
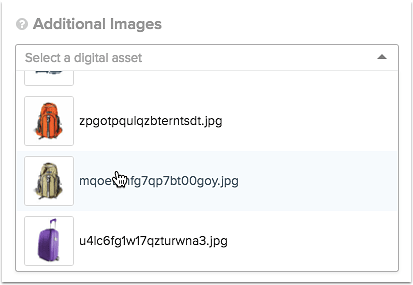
- Choose a file in Salsify If you have already uploaded images to Salsify that you want to use, select from the images in the list below the other two options. You can either scroll to find the file you want to use (they are shown in order of upload from newest to oldest), or use the search box and start typing the image name to narrow the results.
- Add from URL... Choose this option to upload the image from a publically-accessible non-login URL.
- Repeat the process to add additional images, and click Save to save your updates.